Sliders
 |
In a previous post on Polygon Stacks, I wanted to use sliders similar to Spiral Stack to make them interactive. However, at that point, I did not know how to create such sliders in Python Turtle.
While working on the previous post on Bézier Curve Animations, I learnt how to click and drag control points (which are individual Turtles) across the screen. I thought we could use the same principle to implement sliders. In this post, I describe how I implemented the basic slider in Python Turtle and applied it to some examples in my previous posts to make them interactive.
Basic Slider
Similar to the ControlPoint Class in my Bézier Curve Animations post, I created a new Class called Slider, which extends the basic Turtle. The code is very similar and handles click, release and drag on the Turtle.
I added the ability to pass the following values:
- id
- This is used to distinguish sliders and gets passed to the callback function (see below)
- x
- The x coordinate where the slider should be drawn on screen
- y
- The y coordinate where the slider should be drawn on screen
- length
- The length of the slider line in pixels
- min
- The minimum value of the slider
- max
- The maximum value of the slider
- step
- The value with which the values step in this slider
- initial_value
- The initial value that the slider starts with
- label
- The text label to be shown next to the slider on the screen
- callback
- The function that gets called when the slider value is updated. The id and new value are passed to this callback function
I added some basic checks to make sure the slider 'thumb' doesn't go beyond the slider length. I noticed that the 'onrelease' of Turtle doesn't get called if the mouse pointer is not above the Turtle when it is released. So, I added a small check for this if the mouse pointer wanders away.
Here is the code for a basic slider:
Note: You can run, edit and make your own changes to all the code samples in this post and try them out (thanks to trinket). All the code in this post when run is interactive. You can move the sliders (and control points in some) to change the values of variables and see the results immediately.
Bézier Curve Animations
Now that we have a basic slider, I wanted to apply this to my previous projects to see if I could make them interactive.
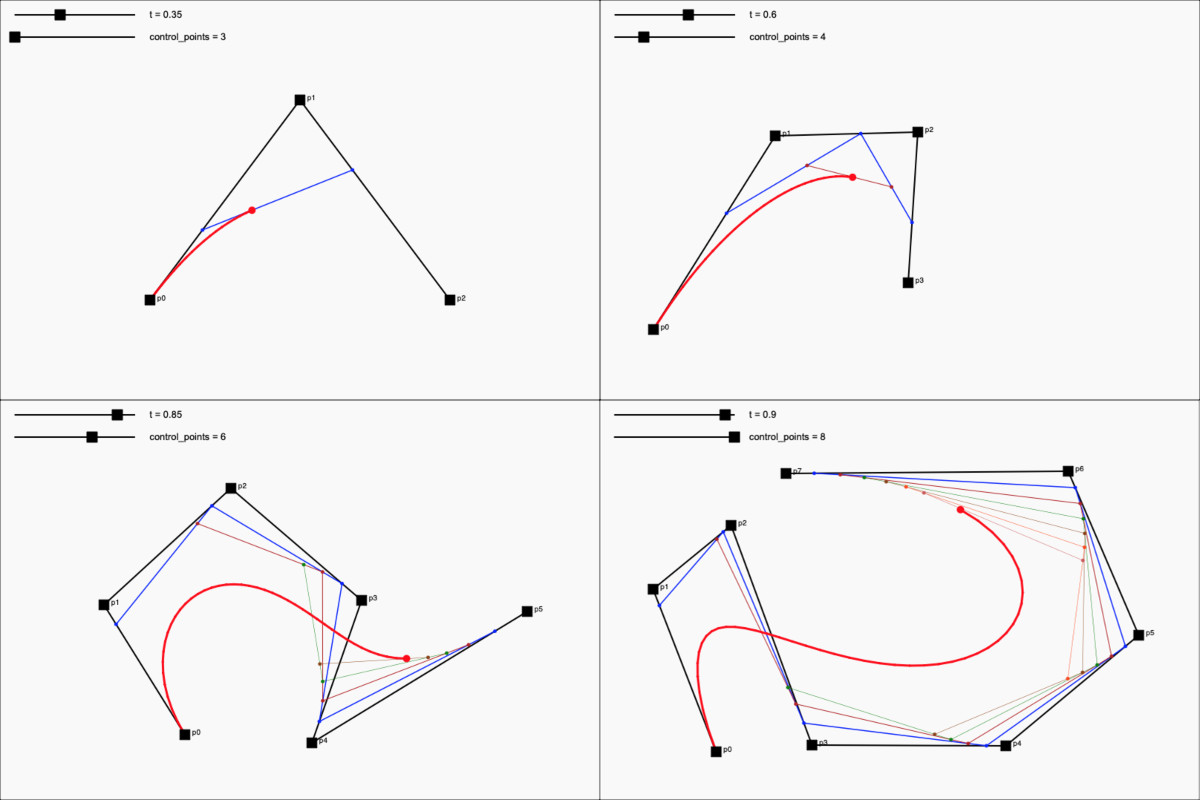
I started with my most recent post on Bézier Curve Animations. I created a slider for the 't' value and the number of control points. With this, we can move the 't' slider to see the animation as it varies from 0 to 1. We can add (or delete) more control points through the control points slider. As before, we can click and drag any of the control points as well.
Here are some interactive examples of Bézier curve animations:
 |
| Interactive examples of Bézier curve animations |
Here is the code for interactive Bézier curve animations:
Click on ▶ to run the interactive example.
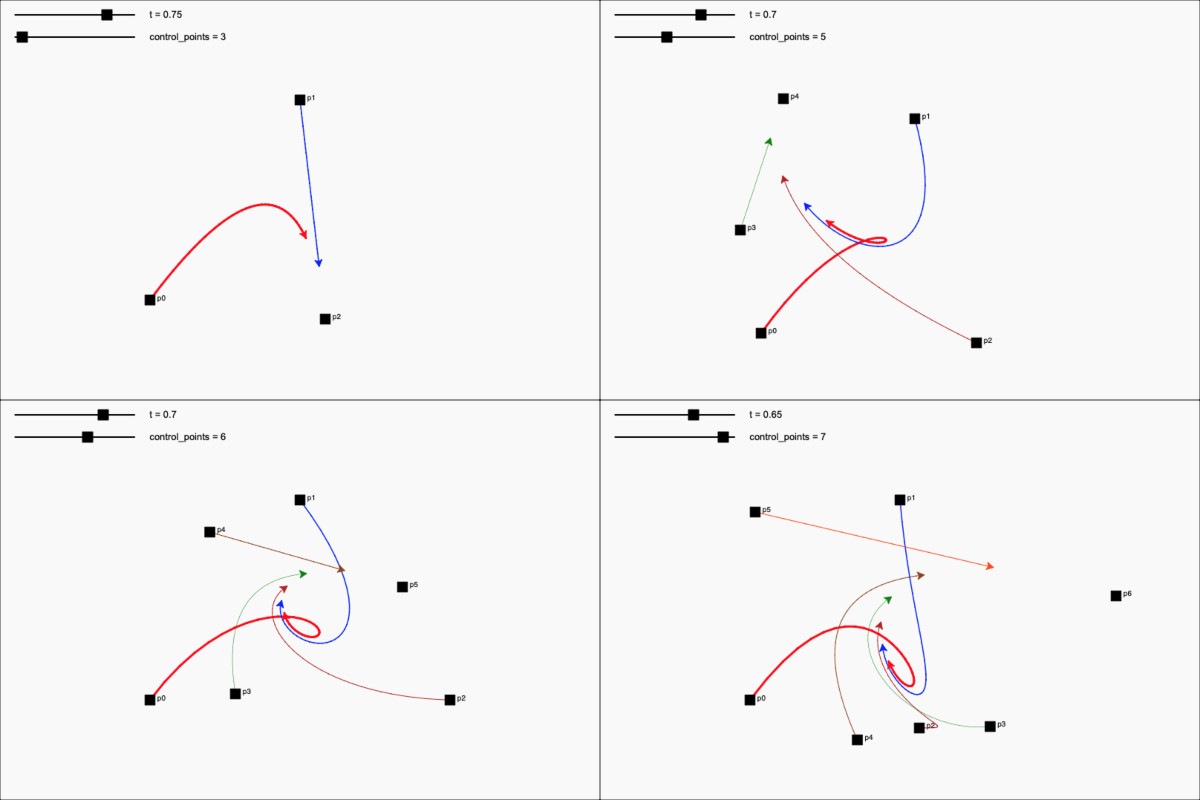
I also added the same sliders for the Bézier curves in pursuit code to show the relationship more closely.
Here are some interactive examples of Bézier curves in pursuit:
 |
| Interactive examples of Bézier curves in pursuit |
Here is the code for interactive Bézier curves in pursuit:
Click on ▶ to run the interactive example.
Polygonal Stacks
This was where I really needed sliders as there are quite a few variables that control the output.
I added sliders to all of these variables (outer sides, inner sides, inner polygons multiple, gap to center, number of twists, pen size, output size on screen and whether to color alternatively). Note that I used a slider to select True / False for the 'checkerboard' variable too. With this, I can see all variations easily on the screen without having to change variables and re-run the code.
Here are some interactive examples of Polygonal Stacks:
 |
| Interactive examples of Polygonal Stacks |
Here is the code for interactive Polygonal Stacks:
Click on ▶ to run the interactive example.
Circular Stacks
I added similar sliders for the Circular Stacks code as well.
Here are some interactive examples of Circular Stacks
 |
| Interactive examples of Circular Stacks |
Here is the code for interactive Circular Stacks:
Click on ▶ to run the interactive example.
Polygonal Checkerboards
I applied the same sliders to Polygon Checkerboards.
Here are some interactive examples of Polygonal Checkerboards:
 |
| Interactive examples of Polygonal Checkerboards |
Here is the code for interactive polygonal checkerboards:
Click on ▶ to run the interactive example.
Polygon Whirls
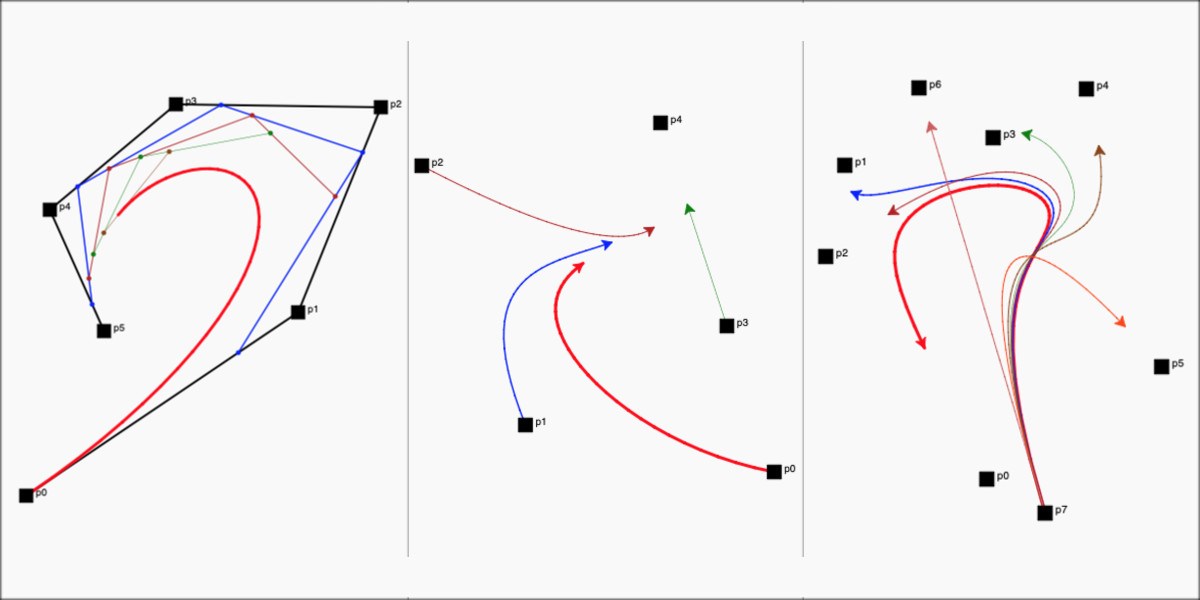
I mentioned how we could draw Polygon Whirls using the same recursive code to draw Bézier curves in a previous post. We get similar outputs to what we did in the Polygons in Polygons post. With sliders and the ability to move the control points, we have a lot more interactivity. We can create arbitrary polygon shapes and corresponding whirls.
Here are some interactive examples of Polygon Whirls:
 |
| Interactive examples of Polygon Whirls |
Here is the code for interactive Polygon Whirls:
Click on ▶ to run the interactive example.
Summary
In summary, Sliders allow a lot of on screen interactivity. I could revisit my previous projects and make them more interactive, which was a lot of fun.
All the code in this post is available on GitHub.
- Pardhav Maradani


